集成 Algolia
1. 配置 Config.json
Config.json 文件是我们后续使用的 Algolia 爬虫需要读取的配置文件,将其放置在 src 目录下
{
  "index_name": "ned-wiki",
  // 这里注意不能填DNS重定向的Url。我是在vercel上部署,所以这是我实际的url
  "start_urls": ["https://blog-sample-ivory.vercel.app/"],
  // Crawler 遍历 sitemap.xml来爬取
  // 定期更新 sitemap.xml and must use English file names, at least prefix
  // 插件: https://docusaurus.io/docs/api/plugins/@docusaurus/plugin-sitemap
  "sitemap_urls": ["http://nedtextbook.com/sitemap.xml"],
  "sitemap_alternate_links": true,
  "stop_urls": [],
  "selectors": {
    "lvl0": "header h1",
    "lvl1": "article h1",
    "lvl2": "article h2",
    "lvl3": "article h3",
    "lvl4": "article h4",
    "lvl5": "article h5",
    "text": "article p"
  },
  "strip_chars": " .,;:#",
  "custom_settings": {
    "separatorsToIndex": "_",
    "attributesForFaceting": [
      "language",
      "version",
      "type",
      "docusaurus_tag",
      "lang"
    ],
    "attributesToRetrieve": [
      "hierarchy",
      "content",
      "anchor",
      "url",
      "url_without_anchor",
      "type"
    ]
  }
}
注意start_urls必须使用你网站真实的 url 例如我通过 DNS 的域名是 https://nedtextbook.com, 而我真实的 url 由于部署在 vercel 上是https://blog-sample-ivory.vercel.app/
如果 url 填错,后续爬虫无任何数据Nb hits: 0
2. 注册 Algolia
创建 Index
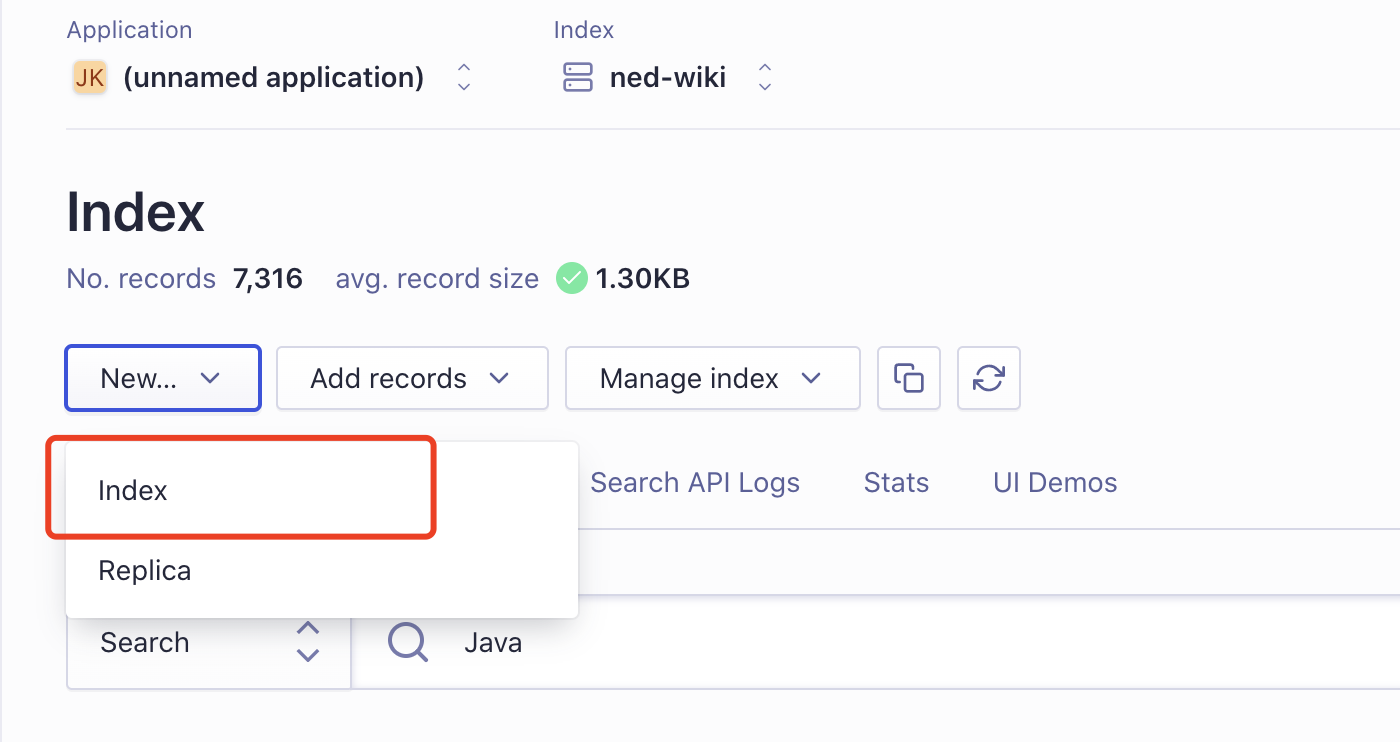
按照官网的注册步骤走完后,会创建一个 Index,Index 可以理解为你 app 的文档数据库
这里还可以额外创建 Index
创建 Api Key
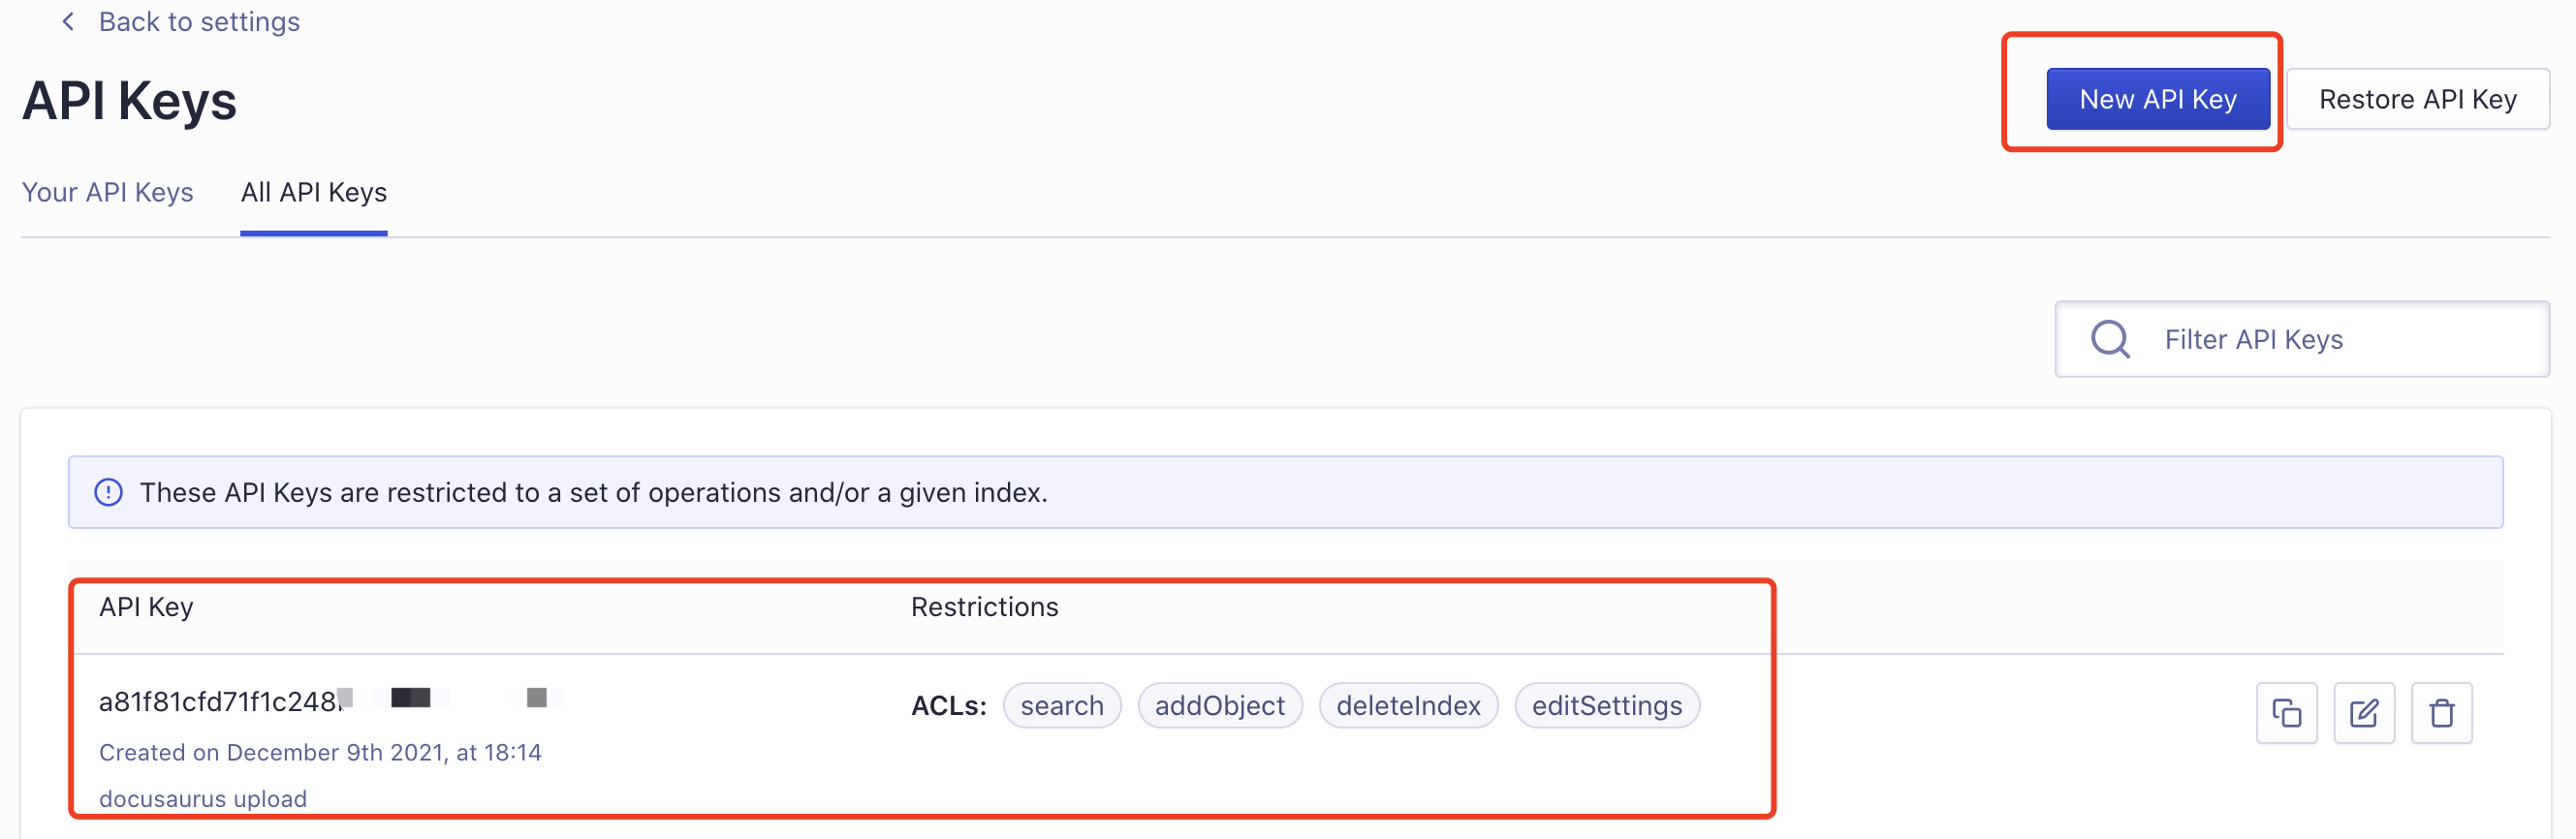
Api Key 是用于搜索与爬虫使用的。其中,搜索的 Api key 放在网站配置中用于请求搜索服务,爬虫的 Api key 放在后端,用于启动爬虫服务。
注意搜索与爬虫 key 的权限不一样
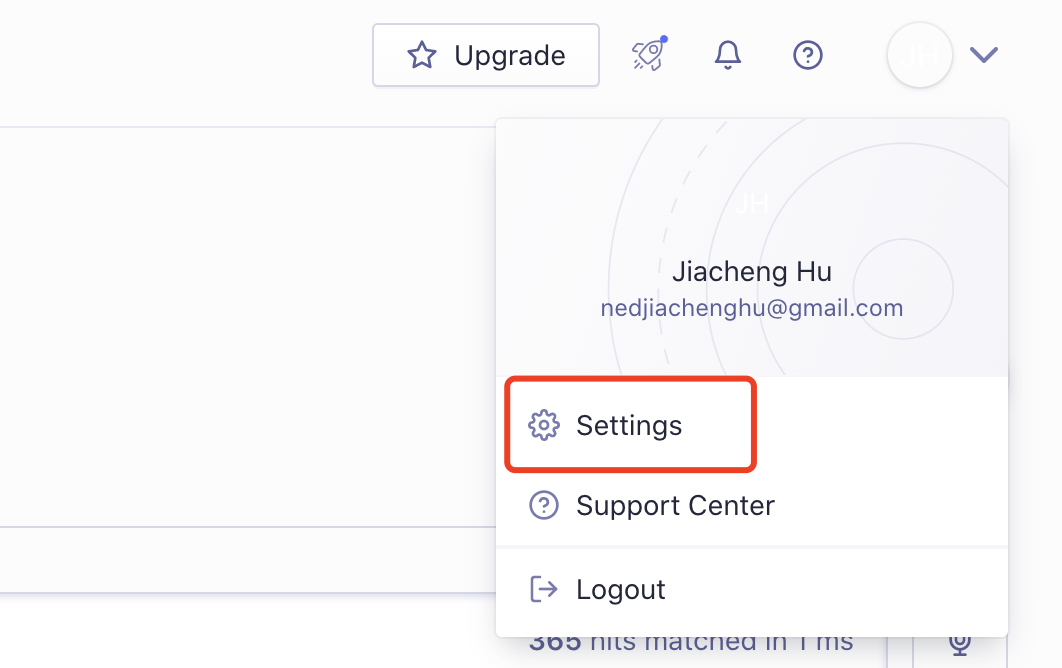
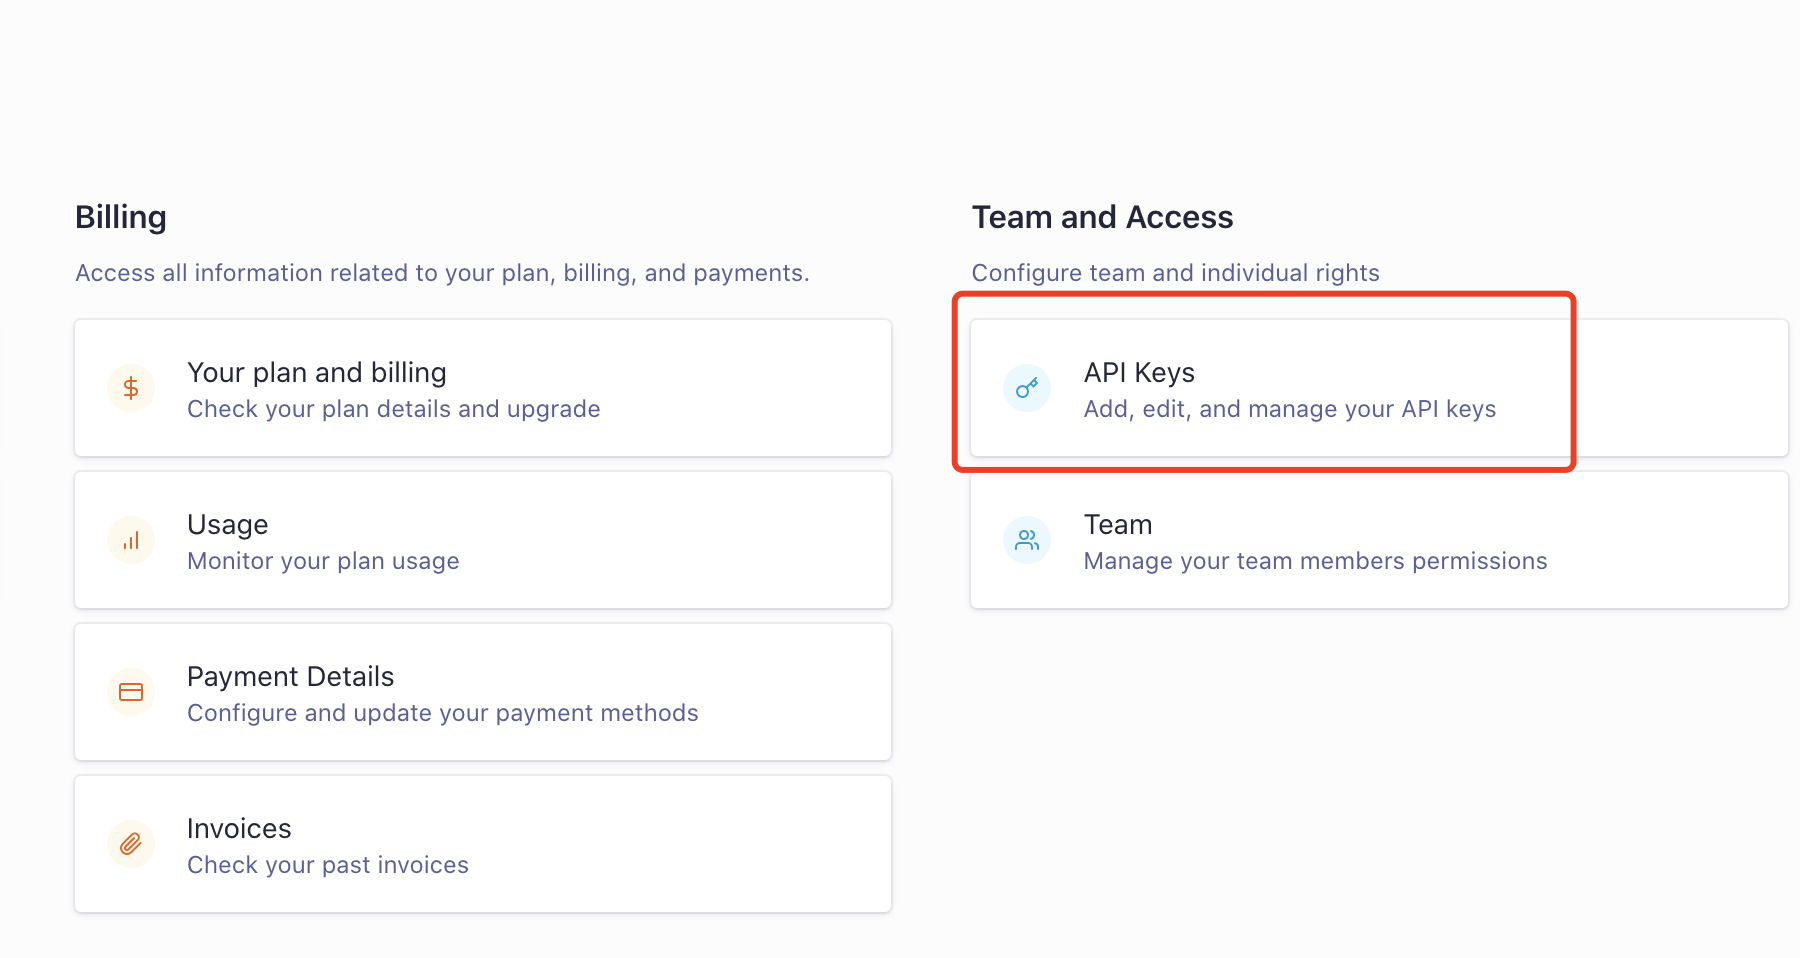
从 Settings -> API Keys -> All API Keys 进入
这是我创建的用于爬虫的 Api key,可以看到有增删改的权限
接下来我们可以去配置自己 app 的环境了
3. 配置 own app 环境
创建.env文件
如果使用 Docker 则创建于 src 目录下,如果使用 Python 爬虫 则创建于爬虫代码目录下 Algolia 提供了这两种的手动爬虫方法 注意: 这里的 Api key 是用于爬虫的增删改 Key
APPLICATION_ID=YOUR_APP_ID
API_KEY=YOUR_API_KEY
配置爬虫环境
这里我使用 Docker 来启动爬虫服务。Python 爬虫环境也很容易配置,可阅读官方文档。
- 安装 Docker, Mac 端直接安装并启动就好 Docker
- 安装 jq install jq, a lightweight command-line JSON processor
安装好后,我们可以启动服务了
我们需要替换 /path/to/your/config.json 为自己的 config.json 路径
# docker run -it --env-file=.env -e "CONFIG=$(cat /path/to/your/config.json | jq -r tostring)" algolia/docsearch-scraper
# 例如这是我的爬虫代码
docker run -it --env-file=.env -e "CONFIG=$(cat config.json | jq -r tostring)" algolia/docsearch-scraper
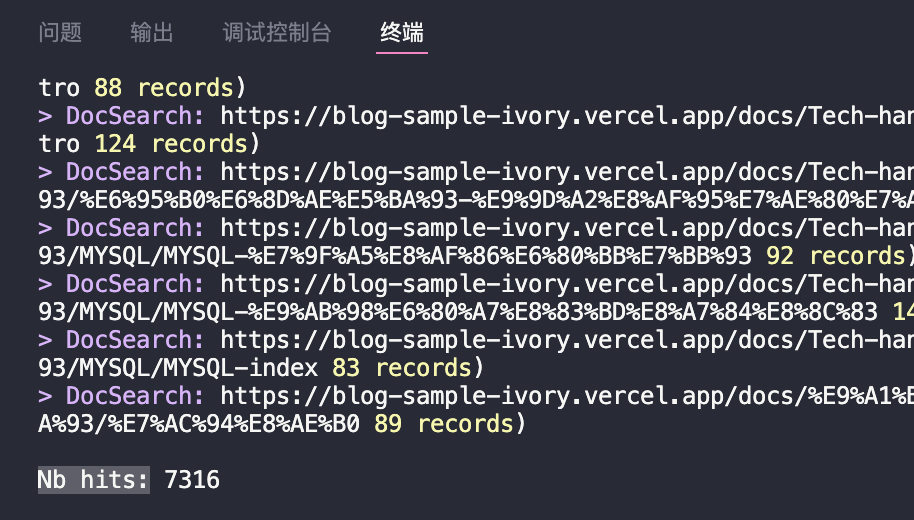
爬取结束,可以看到爬取了 7316 条数据到我们的 Index 中
4. 配置 docusaurus.config.js
配置 Search 服务和集成 Search bar 在我们网站。这里填入用于搜索请求的 Api key
module.exports = {
  // ...
  themeConfig: {
    // ...
    algolia: {
      // The application ID provided by Algolia
      appId: "YOUR_APP_ID",

      // Public API key: it is safe to commit it
      apiKey: "YOUR_SEARCH_API_KEY",

      indexName: "YOUR_INDEX_NAME",

      // Optional: see doc section below
      contextualSearch: true,

      // Optional: Specify domains where the navigation should occur through window.location instead on history.push. Useful when our Algolia config crawls multiple documentation sites and we want to navigate with window.location.href to them.
      externalUrlRegex: "external\\.com|domain\\.com",

      // Optional: Algolia search parameters
      searchParameters: {},

      //... other Algolia params
    },
  },
};